


![]()
Price: $24.99
(as of Apr 07, 2025 05:21:28 UTC - Details)
The Best Way to Apply Press-On Nails: Your Ultimate Guide
Introduction
If you've ever dreamed of having flawless nails without the hassle of a salon visit, press-on nails might just be your new best friend. In this guide, we’ll explore the best way to apply press-on nails, ensuring you achieve a perfect manicure every time. Whether you’re a seasoned pro or a complete beginner, mastering the art of applying press-on nails can elevate your nail game. We’ll dive into practical tips, tricks, and techniques, all tailored to make your experience enjoyable and successful.
Understanding Press-On Nails
What Are Press-On Nails?
Press-on nails are pre-designed nail tips that you can easily apply at home. They come in various shapes, sizes, and designs, making it easy for anyone to achieve beautiful nails in a matter of minutes. Unlike traditional acrylic or gel nails, press-ons require minimal effort and tools, making them an accessible option for all.
Benefits of Using Press-On Nails
One of the best things about press-on nails is their convenience. You can change your nail style in an instant without the commitment of a salon treatment. Plus, they are often more affordable than professional manicures. With proper application, press-on nails can last several days, giving you a stunning look that’s easy to maintain.
Preparing Your Natural Nails
Nail Preparation: The Key to Long-Lasting Results
Before applying press-on nails, it’s crucial to prepare your natural nails. Start by cleaning your nails thoroughly to remove any dirt or oil. This step ensures that the adhesive sticks well. Use a gentle nail file to shape your nails and push back your cuticles for a neat appearance.
Choosing the Right Size
Selecting the correct size for your press-on nails is essential. Most kits come with multiple sizes, so take your time to find the perfect fit for each finger. A well-fitted press-on nail not only looks better but also lasts longer. If necessary, you can file the edges for a more customized fit.
Applying Press-On Nails
Step-by-Step Application Guide
Now that your nails are prepared, it’s time to apply the press-on nails. Follow these simple steps for a professional-looking finish:
-
Gather Your Tools: You’ll need your press-on nails, adhesive (either glue or adhesive tabs), and a nail file.
-
Choose Your Adhesive: If you prefer a temporary hold, adhesive tabs are a great option. For a longer-lasting application, nail glue is recommended.
-
Apply the Adhesive: If using glue, apply a small amount to the back of the press-on nail and your natural nail. If using adhesive tabs, peel off the backing and stick them onto your natural nail.
-
Press and Hold: Align the press-on nail with your cuticle and press down firmly for about 10-15 seconds. This ensures a strong bond.
- Repeat: Continue the process for each nail until all press-ons are applied.
Tips for a Flawless Finish
- Use a Nail File: After application, gently file the tips of your press-on nails to smooth out any rough edges.
- Add a Top Coat: For added shine and durability, consider applying a clear top coat over your press-on nails. This step enhances the overall look and helps them last longer.
Maintaining Your Press-On Nails
How to Care for Your Press-Ons
To ensure your press-on nails stay beautiful for as long as possible, it’s important to take care of them. Avoid exposing your hands to harsh chemicals or excessive water. Wearing gloves while washing dishes or cleaning can help preserve your manicure.
Removing Press-On Nails Safely
When it’s time to remove your press-on nails, do so gently to avoid damaging your natural nails. Soak your nails in warm, soapy water for about 10 minutes to loosen the adhesive. Carefully lift the press-on nails starting from the edges. If they don’t come off easily, soak them a bit longer.
Troubleshooting Common Issues
Dealing with Lifting Edges
If you notice lifting edges on your press-on nails, it could be due to insufficient cleaning of your natural nails or not using enough adhesive. Always make sure to prep your nails thoroughly and apply the right amount of glue or adhesive tabs.
Reapplying Press-On Nails
If your press-on nails start to lift or fall off, don’t worry! You can easily reapply them. Just clean the area, apply fresh adhesive, and press them back on. This quick fix can save you from a last-minute nail emergency.
Creative Ways to Style Press-On Nails
Nail Art and Customization Ideas
Press-on nails can be a blank canvas for creativity. Consider adding your own nail art using nail polish or stickers to make your press-ons uniquely yours. Experiment with different designs, colors, and embellishments to match your outfit or mood.
Seasonal Styles
With press-on nails, it’s easy to change your look for different seasons or occasions. Embrace holiday-themed designs or stick to classic colors for an elegant look. The possibilities are endless!
Conclusion
In summary, applying press-on nails is a simple and effective way to achieve salon-quality results at home. By following the steps outlined in this guide, you can ensure a beautiful, long-lasting manicure. Remember to prepare your natural nails, choose the right size, and care for your press-ons to keep them looking fabulous. With the best way to apply press-on nails in your toolkit, you’ll be ready to impress with your stylish and effortless nails!
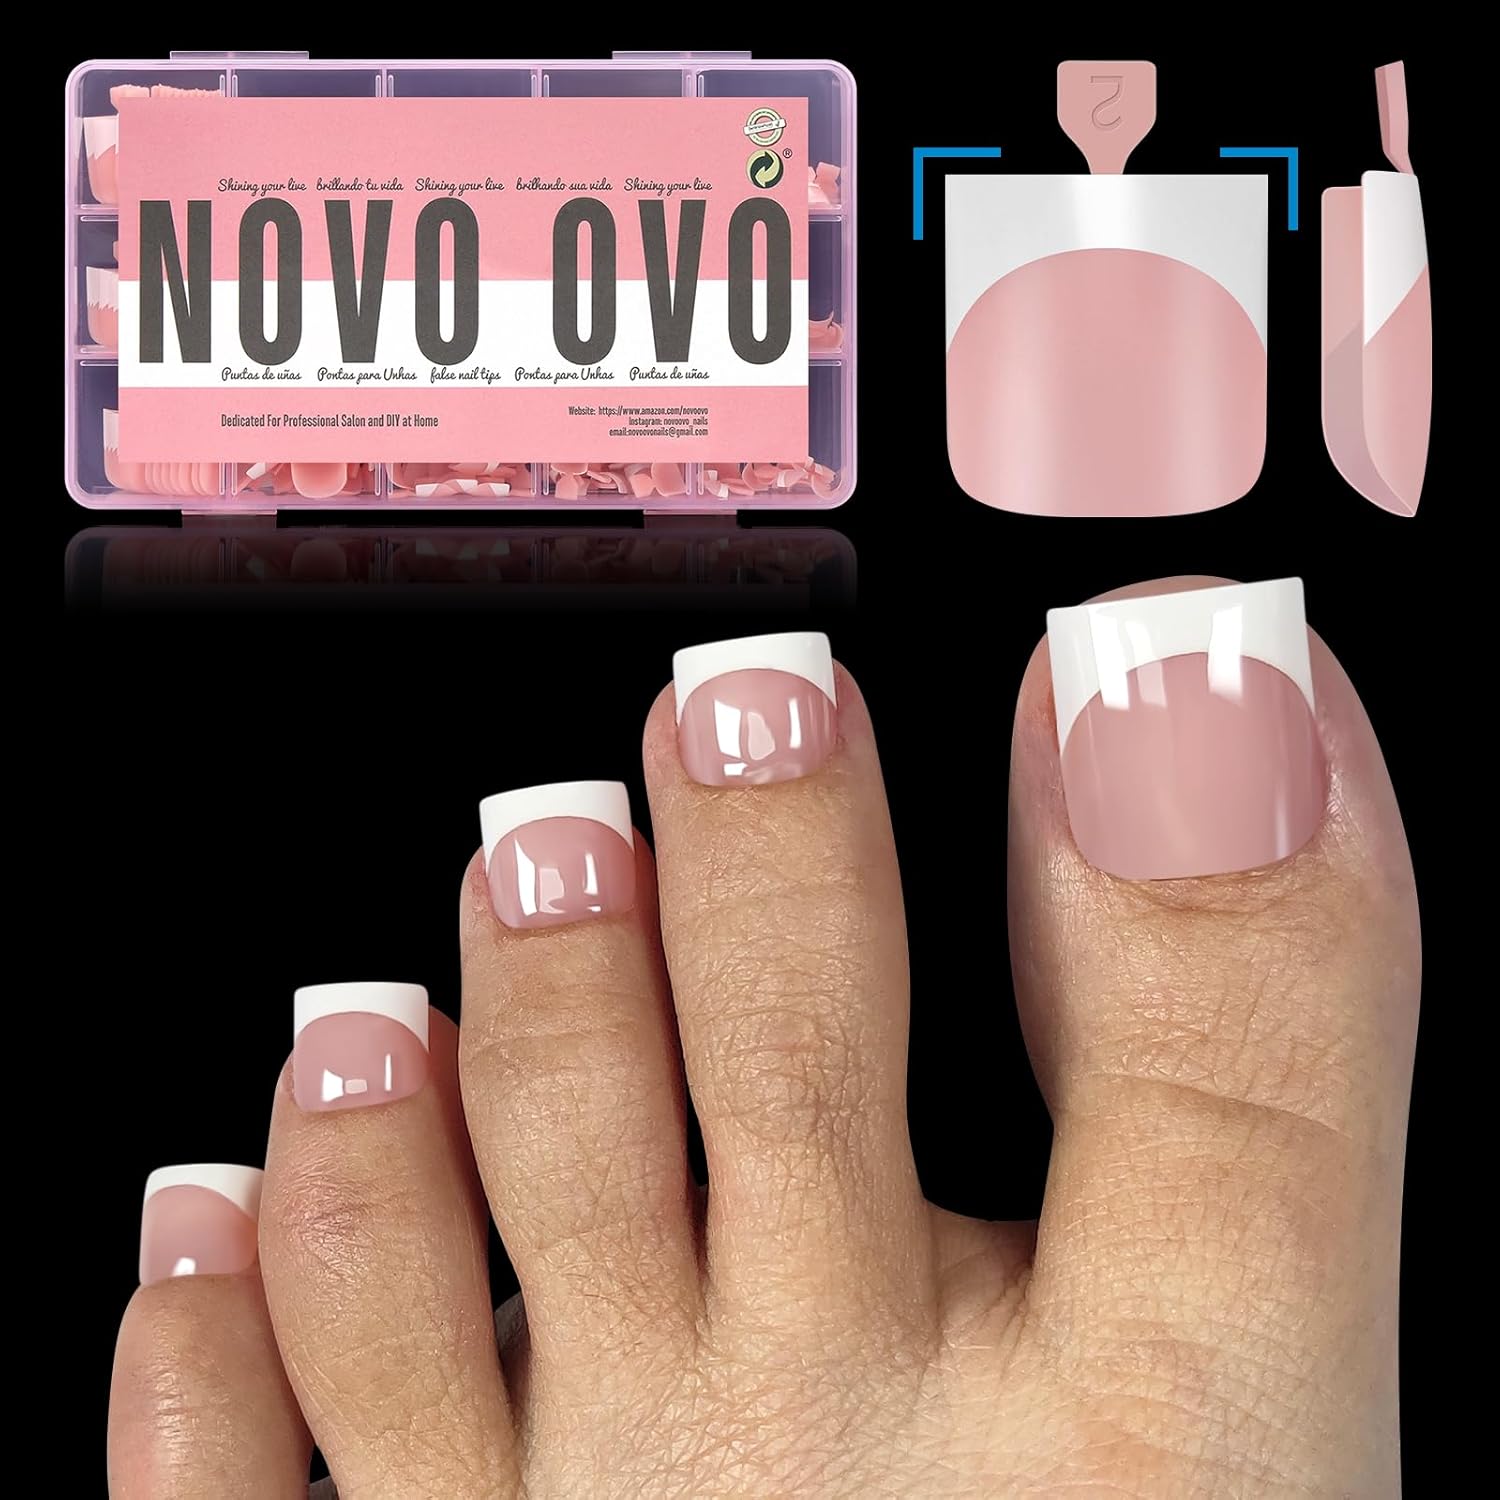
GET THE PERFECT FRENCH TIP PEDICURE WITH JUST A FEW SIMPLE STEPS! NOVO OVO pre-designed nails are here to make your pedicure easier! We've already applied a tip primer and base coat on the soft gel nail tips. Simply stick them on your nails with UV gel or glue, then add a layer of builder gel and top coat. In just 15 minutes, you'll have stunning French tips on your toenails!
UNLEASH NAIL ARTIEST'S CREATIVITY WITH EASE: Our pre-designed French Tip toenails are a dream come true for nail artists. With the matte surface, you can easily draw patterns, apply rhinestones, and add stickers. This means you can spend more time and effort on your unique designs while saving time and energy on making French Tips basic pattern.
SUITABLE FOR VARIOUS TOE NAIL BED SHAPES: The slightly longer design of the nail tips makes them suitable for individuals with slightly long, medium (square-shaped), or short nail beds. If you find the tips too long, you can file them down to your desired length. For even longer nail tips, check out our other products, such as the Long Square or Extra Long toe nail tips.
COMPREHENSIVE SIZE RANGE: With 15 different sizes available for various toes and 5 size options specifically for the big toe, our nail tips are suitable for most foot sizes, especially wide toes, and can even be used by men.
VERSATILE AND POPULAR: These nail tips are designed for wearing with open-toe shoes like flip flops, sandals, and slippers. They are also perfect for enhancing the look of high heels and even flaunting them with bare feet. Get ready for a fabulous pedicure this summer and make a statement at the beach or swimming pool. They also make a fantastic gift for your girlfriend, wife, or family members.